
As a passionate home recording enthusiast, I understand the importance of having the right audio cables to capture high-quality sound and ensure a seamless signal flow between your various pieces of equipment. From microphones to interfaces, speakers, and more, every connection plays a crucial role in preserving the integrity of your audio signal. This comprehensive guide will dive deep into the realm of audio cables, equipping you with the knowledge to make informed decisions and elevate your home recording experience.
Over the years, I’ve experimented with countless cables and setups, learning firsthand the impact that cable quality can have on your recordings. I’ve made mistakes, fallen for marketing gimmicks, and ultimately discovered the true value of investing in the right cables for your specific needs.
In this guide, I’ll share my personal experiences and insights, combined with expert knowledge and industry best practices, to help you navigate the world of audio cables with confidence. Whether you’re a seasoned pro or just starting your home recording journey, this guide will provide you with the tools you need to make informed decisions and achieve the best possible audio quality.
Understanding Audio Cable Types
Before we delve into the specifics, let’s familiarize ourselves with the different types of audio cables commonly used in home recording setups:
1. XLR Cables
XLR cables are the industry standard for connecting microphones to audio interfaces, mixers, and other professional-grade equipment. These cables are known for their robust construction, shielding against electromagnetic interference, and balanced signal transmission, which minimizes noise and ensures superior audio quality over longer cable runs.
In my experience, investing in high-quality XLR cables has been a game-changer for capturing pristine vocal and instrument recordings. The balanced signal transmission and effective shielding provided by XLR cables have significantly reduced unwanted noise and interference, resulting in cleaner, more accurate recordings.
2. TRS (Tip-Ring-Sleeve) Cables
TRS cables, also known as 1/4-inch or 6.35mm cables, are widely used for connecting various components in a home recording setup, such as guitars, keyboards, and other line-level devices to interfaces, amplifiers, and mixers. They can carry balanced or unbalanced signals, depending on the equipment they’re connecting.
When it comes to TRS cables, I’ve found that opting for balanced cables whenever possible can make a noticeable difference in reducing noise and interference, especially in setups with longer cable runs or potential interference sources.
3. TS (Tip-Sleeve) Cables
TS cables, often referred to as instrument cables or guitar cables, are unbalanced cables used for connecting electric guitars, basses, and other high-impedance instruments to amplifiers or audio interfaces. While they lack the noise rejection capabilities of balanced cables, they are suitable for shorter cable runs in home recording environments.
For my guitar recordings, I’ve learned the importance of using high-quality TS cables to preserve the natural tone and dynamics of the instrument. Cheap, poorly shielded cables can introduce unwanted noise and signal degradation, compromising the overall quality of your recordings.
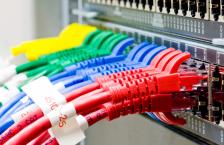
4. RCA Cables
RCA cables, with their distinctive red and white connectors, are commonly used for connecting consumer-grade audio equipment, such as CD players, TVs, and home theater systems. In home recording setups, they may be used for connecting certain interfaces, mixers, or other devices with RCA inputs and outputs.
While RCA cables may not be as prevalent in professional recording environments, they can still play a role in home setups. I’ve found that investing in well-shielded RCA cables can help minimize interference and maintain signal integrity when connecting consumer-grade equipment to your recording setup.
Cable Construction and Quality
Not all audio cables are created equal. Understanding the components that make up a cable and how they affect audio quality is essential for making informed purchasing decisions. Here’s what you need to know:
1. Conductors
The conductors within an audio cable are responsible for carrying the audio signal. High-quality cables typically feature oxygen-free copper (OFC) or silver-plated copper conductors, which offer better conductivity and signal transmission compared to cheaper alternatives.
In my experience, upgrading to cables with high-quality conductors has resulted in a noticeable improvement in clarity and detail, especially when recording intricate instruments or capturing subtle nuances in vocal performances.
2. Shielding
Shielding is a crucial component that protects the audio signal from external electromagnetic interference (EMI) and radio frequency interference (RFI). Cables with better shielding, such as braided or spiral shields, will provide superior noise rejection and maintain signal integrity, especially in environments with potential interference sources.
I’ve learned this lesson the hard way – using poorly shielded cables in my home studio, which is located near various electronic devices and appliances, resulted in unwanted buzzing and humming in my recordings. Investing in well-shielded cables has been a game-changer, allowing me to capture clean, noise-free audio even in less-than-ideal environments.
3. Insulation
The insulation material surrounding the conductors plays a role in minimizing signal loss and ensuring durability. High-quality cables often feature insulation materials like polyethylene or polyurethane, which offer better electrical properties and resistance to environmental factors.
While insulation may not be the most exciting aspect of cable construction, I’ve found that cables with high-quality insulation tend to last longer and maintain their performance over time, even with regular use and handling.
4. Connectors
The connectors at the ends of audio cables are just as important as the cables themselves. Well-constructed connectors with robust strain relief and proper shielding termination can significantly impact the overall cable performance and longevity.
I’ve had my fair share of cable failures due to poorly constructed connectors, which can lead to intermittent signal loss, crackling noises, and even complete cable failure. Investing in cables with high-quality connectors has been a worthwhile investment, ensuring reliable connections and minimizing frustrating signal issues during critical recording sessions.
Choosing the Right Cables for Your Home Recording Setup
With a better understanding of audio cable types and construction, you can now make informed decisions when selecting cables for your home recording setup. Here are some key considerations:
1. Application and Signal Type
The type of cable you choose should be determined by the specific application and signal type you’re working with. For example, XLR cables are ideal for microphone connections, while TRS cables are suitable for line-level devices like keyboards and interfaces.
As someone who has experimented with various setups, I can attest to the importance of using the right cable for the job. Trying to cut corners or use the wrong cable type can lead to signal degradation, noise issues, and ultimately, subpar recordings.
2. Cable Length
Longer cable runs can be more susceptible to signal degradation and interference. As a general rule, use the shortest cable length possible for your setup, and consider higher-quality cables with better shielding for longer runs.
In my early days of home recording, I made the mistake of using cheap, unshielded cables for longer runs, resulting in significant noise and signal loss. Learning from this experience, I now prioritize using high-quality, well-shielded cables for any cable runs longer than 10-15 feet, ensuring optimal signal integrity and minimizing noise.
3. Budget and Quality Balance
While high-end cables can be expensive, investing in quality cables can pay dividends in terms of audio fidelity and longevity. However, it’s important to strike a balance between budget and performance requirements, as even moderately priced cables from reputable brands can offer excellent value.
Through trial and error, I’ve discovered that you don’t necessarily need to break the bank to achieve great results. By researching reputable cable brands and prioritizing quality construction and shielding, you can often find affordable options that outperform their price tag.
4. Compatibility and Connectors
Ensure that the cables you choose have the appropriate connectors for your equipment. Additionally, consider investing in adapters or cable testers to ensure compatibility and troubleshoot any potential issues.
I’ve learned this lesson the hard way – trying to force incompatible connectors or using makeshift adapters can lead to signal issues, equipment damage, and frustration. Taking the time to ensure proper compatibility and investing in quality adapters or testers can save you a lot of headaches in the long run.
Cable Management and Organization
Proper cable management is essential for maintaining a tidy and efficient home recording setup. Here are some tips to help you keep your cables organized:
- Cable Labeling: Label your cables with their respective connections or devices to avoid confusion and make setup and teardown easier. I use a simple labeling system with masking tape and a permanent marker, which has saved me countless hours of frustration when setting up or troubleshooting my rig.
- Cable Wraps and Ties: Use cable wraps, ties, or velcro straps to keep cables neatly bundled and organized, preventing tangles and potential damage. I’ve found that investing in high-quality cable ties and wraps not only keeps my setup tidy but also helps extend the lifespan of my cables by minimizing stress and strain.
- Cable Raceways or Sleeves: Consider using cable raceways or sleeves to route cables along walls or desks, keeping them out of the way and protected from foot traffic. This simple solution has been a game-changer for my home studio, allowing me to keep cables organized and out of harm’s way while maintaining a clean, professional-looking setup.
- Cable Management Boxes: Invest in cable management boxes or racks to keep your cables organized and easily accessible, especially in more complex setups. While these can be an investment, they’ve proven invaluable in my studio, helping me quickly identify and access the cables I need without wasting time untangling and sorting through a mess of cables.
- Regular Maintenance: Periodically inspect your cables for signs of wear or damage, and replace them as needed to ensure optimal performance and safety. I’ve learned this lesson the hard way – ignoring frayed or damaged cables can lead to signal issues, equipment damage, and even potential safety hazards.
By implementing these cable management strategies, you’ll not only maintain a tidy and efficient workspace but also extend the lifespan of your cables and minimize frustration during recording sessions.
Addressing Common Myths and Misconceptions
As with any specialized field, the world of audio cables is not immune to myths and misconceptions. Let’s address some of the most common ones:
Myth: Expensive cables always sound better.
Reality: While high-quality cables can certainly improve audio fidelity, the perceived difference in sound quality often reaches a point of diminishing returns beyond a certain price point. Factors like cable construction, shielding, and proper termination play a more significant role than the cost alone.
In my experience, I’ve found that investing in well-constructed cables from reputable brands can yield excellent results without breaking the bank. While there may be some audible differences between mid-range and high-end cables, the improvements become increasingly subtle and may not justify the significant price premium for many home recording enthusiasts.
Myth: Cable length doesn’t matter for short runs.
Reality: Even for shorter cable runs, using high-quality cables with proper shielding and construction can make a noticeable difference in reducing noise and preserving signal integrity.
I’ve learned this lesson firsthand – even in my relatively compact home studio setup, using cheap, unshielded cables for short runs introduced unwanted noise and interference. Upgrading to well-shielded cables, even for shorter runs, has resulted in cleaner, more accurate recordings.
Myth: All cables are created equal.
Reality: As we’ve discussed, cables can vary significantly in terms of their construction, materials, and overall quality, which directly impacts their performance and durability.
Through my experiences, I’ve come to appreciate the differences between cables from various manufacturers and price points. While some cables may appear similar on the surface, their internal construction and materials can greatly affect their performance and longevity.
By understanding and addressing these common myths, you can make more informed decisions and avoid falling prey to marketing gimmicks or misinformation. Trust your ears, do your research, and prioritize quality construction and shielding over flashy marketing claims.
Conclusion
Investing in the right audio cables for your home recording setup is an essential step towards capturing high-quality audio and ensuring a seamless signal flow between your various components. By understanding the different cable types, construction elements, and quality factors, you can make informed decisions that align with your specific needs and budget.
Remember, while high-end cables can offer superior performance, it’s equally important to strike a balance between quality and cost-effectiveness. With proper cable management and organization, you can maintain a tidy and efficient home recording environment, allowing you to focus on what truly matters – creating great music.


0