
In today’s interconnected world, the ability to efficiently link multiple computer systems is crucial for both personal and professional use. Local Area Networks (LANs) offer a powerful solution for connecting devices within a limited area, enhancing data sharing, resource optimization, and collaborative capabilities. This comprehensive guide will walk you through the process of connecting two systems using a LAN, covering everything from the basics to advanced tips and troubleshooting.
Understanding LAN Basics
Before diving into the connection process, it’s essential to grasp the fundamentals of LANs. A Local Area Network consists of computers and associated devices sharing a common communications line or wireless link within a restricted area, typically within a single building or campus. LANs are vital for:
- Sharing resources like files, printers, and internet connections
- Facilitating communication between connected devices
- Boosting data security through centralized control
- Enhancing overall productivity in work environments
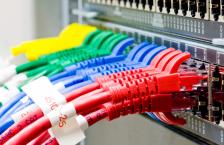
LANs can be either wired (using Ethernet cables) or wireless (Wi-Fi), each offering unique benefits. For this guide, we’ll focus on wired LAN connections, known for their superior speed and reliability for direct system-to-system links.
Required Equipment
To connect two systems using a LAN, you’ll need the following:
- Two computers with Ethernet ports
- Two Ethernet cables (preferably Cat5e or higher)
- A network switch or router (for more flexible setups)
Note: While it’s possible to connect two computers directly using a single Ethernet cable, employing a switch or router provides more flexibility and allows for future expansion of your network.
Step-by-Step Connection Process
1. Prepare Your Systems
Before making any physical connections, ensure both computers are powered on and have functioning network adapters. To verify this on Windows:
- Open the Start menu and search for “Device Manager”
- Expand the “Network adapters” section
- Look for an Ethernet adapter (e.g., “Realtek PCIe GBE Family Controller”)
If you don’t see an Ethernet adapter listed, you may need to install drivers or use a USB-to-Ethernet adapter.
2. Connect the Hardware
Now, let’s physically connect the systems:
- Plug one end of an Ethernet cable into the Ethernet port of the first computer
- Connect the other end to an available port on your network switch or router
- Repeat steps 1-2 for the second computer, using the second Ethernet cable
If you’re using a direct connection without a switch/router:
- Plug one end of a single Ethernet cable into the first computer’s Ethernet port
- Connect the other end directly to the second computer’s Ethernet port
3. Configure Network Settings
With the physical connections in place, it’s time to configure the network settings:
For Windows 10/11:
- Open the Start menu and go to Settings > Network & Internet > Ethernet
- Click on “Change adapter options”
- Right-click on the Ethernet connection and select “Properties”
- Select “Internet Protocol Version 4 (TCP/IPv4)” and click “Properties”
- Choose “Use the following IP address” and enter these details:
- For the first computer:
IP address: 192.168.1.1
Subnet mask: 255.255.255.0 - For the second computer:
IP address: 192.168.1.2
Subnet mask: 255.255.255.0
- Click “OK” to save the settings
For macOS:
- Go to System Preferences > Network
- Select “Ethernet” from the left sidebar
- Click on the “Configure IPv4” dropdown and choose “Manually”
- Enter the IP address and Subnet mask as described above for Windows
- Click “Apply” to save the changes
4. Test the Connection
To verify that your LAN connection is working:
- Open Command Prompt (Windows) or Terminal (macOS)
- Type
ping 192.168.1.2(from the first computer) orping 192.168.1.1(from the second computer) - Press Enter
If the connection is successful, you’ll see replies from the pinged IP address. If not, double-check your physical connections and network settings.
Sharing Resources Over Your LAN
Now that your systems are connected, you can start sharing resources:
File Sharing
On Windows:
- Right-click on the folder you want to share
- Select “Properties” > “Sharing” > “Share”
- Choose the users you want to share with and set permissions
- Click “Share” to finalize
On macOS:
- Go to System Preferences > Sharing
- Check the box next to “File Sharing”
- Click the “+” button under “Shared Folders” to add folders you want to share
Printer Sharing
Most modern printers can connect directly to your network via Ethernet or Wi-Fi. If you have an older USB printer:
- Connect the printer to one of the computers
- Enable printer sharing in your operating system’s settings
- Install the shared printer on the second computer by browsing the network
Troubleshooting Common LAN Issues
If you encounter problems with your LAN connection, try these troubleshooting steps:
- Check physical connections: Ensure all cables are securely plugged in and not damaged
- Restart devices: Sometimes, a simple restart of both computers and the router/switch can resolve issues
- Update network drivers: Visit your computer manufacturer’s website to download the latest network adapter drivers
- Disable firewalls temporarily: Firewalls can sometimes interfere with LAN connections
- Use static IP addresses: If DHCP is causing issues, try setting static IP addresses as described earlier
Enhancing Your LAN Setup
Once you’ve mastered connecting two systems, consider these advanced tips to optimize your network:
- Implement network security: Use strong passwords and enable encryption on your router to protect your data
- Optimize network performance: Regularly update your router’s firmware and use Quality of Service (QoS) settings to prioritize critical traffic
- Expand your network: Add more devices or consider setting up a wireless access point for increased flexibility
- Use high-quality Ethernet cables: Invest in Cat6 or Cat6a cables for improved performance and future-proofing your network
- Monitor network traffic: Utilize network monitoring tools to identify bottlenecks and optimize data flow
Conclusion
Connecting two systems using a LAN is a fundamental skill in today’s digital landscape. By following this step-by-step guide, you’ve not only learned how to establish a basic LAN connection but also gained insights into troubleshooting and optimizing your setup. Whether you’re sharing files, collaborating on projects, or simply exploring the world of networking, your new LAN skills will serve you well in both personal and professional contexts.
Remember, practice makes perfect. Don’t be afraid to experiment with different network configurations and explore the full potential of your LAN setup. As you become more comfortable with networking concepts, you’ll find countless ways to leverage your LAN for improved productivity and connectivity.
By mastering LAN connections, you’re taking an important step towards building a more efficient and interconnected digital environment. Whether you’re a home user looking to share resources between computers or a professional setting up a small office network, the principles and techniques covered in this guide will provide a solid foundation for your networking endeavors.


0