Are you tired of watching movies, playing games, or browsing the web on your laptop’s cramped display? Connecting your laptop to your TV opens up a world of possibilities, allowing you to enjoy your favorite content on a bigger, better screen. In this comprehensive guide, I’ll walk you through the easiest methods to mirror your Windows, Mac, or Chromebook display to any smart TV.
Whether you prefer the reliability of an HDMI cable or the convenience of wireless streaming, I’ve got you covered with step-by-step instructions and expert tips. By the end of this article, you’ll be ready to level up your streaming setup and experience your laptop’s display like never before. Let’s dive in!
Why You Should Connect Your Laptop to Your TV
Streaming your laptop screen to your TV offers numerous benefits:
- Enjoy content on the big screen: Watch your favorite movies, TV shows, and videos on a larger, more immersive display.
- Level up your gaming experience: Play PC games on your TV for a more engaging, console-like experience.
- Enhance presentations: Share slideshows, documents, and web pages with a room full of people more easily.
- Collaborate effectively: Mirror your laptop screen to a TV for seamless group work and discussions.
- Improve multitasking: Use your TV as a secondary monitor to boost productivity and efficiency.
How to Connect Your Laptop to Your TV: 3 Easy Methods
There are three primary ways to stream your laptop display to your TV screen:
- Wired connection with an HDMI cable
- Wireless connection with Miracast or Wi-Fi Direct
- Wireless connection with Chromecast or AirPlay
I’ll guide you through each method, so you can choose the one that best fits your needs and setup.
Method 1: Wired HDMI Connection
One of the most reliable and straightforward ways to connect your laptop to your TV is by using an HDMI cable. HDMI carries both high-definition video and audio from your laptop to your TV, providing a stable, high-quality connection.
What You’ll Need
- An HDMI cable (preferably high-speed for 4K content)
- A laptop with an HDMI output port
- A TV with an HDMI input port
Step-by-Step Instructions
- Plug one end of the HDMI cable into your laptop’s HDMI output port.
- Connect the other end to an available HDMI input on your TV.
- Using your TV remote, switch to the corresponding HDMI input.
- Your laptop screen should now appear on your TV.
Expert Tips
- Ensure your laptop’s display settings are configured to output to the TV.
- Adjust your TV’s aspect ratio or zoom settings if the laptop screen appears cut off.
- If you encounter issues, try a different HDMI cable or port on your TV.
Method 2: Wireless Connection with Miracast or Wi-Fi Direct
For a clutter-free setup, you can connect your laptop to your TV wirelessly using Miracast or Wi-Fi Direct. This method works well for most modern Windows laptops and TVs.
What You’ll Need
- A laptop with Miracast support (Windows 8.1 or later)
- A smart TV with Miracast or Wi-Fi Direct support
Step-by-Step Instructions
- On your laptop, open the Action Center and click Connect.
- Select your TV from the list of available displays.
- If prompted, enter the PIN shown on your TV screen.
- Your laptop screen should now be mirrored on your TV.
Expert Tips
- Ensure your laptop and TV are connected to the same Wi-Fi network for the best performance.
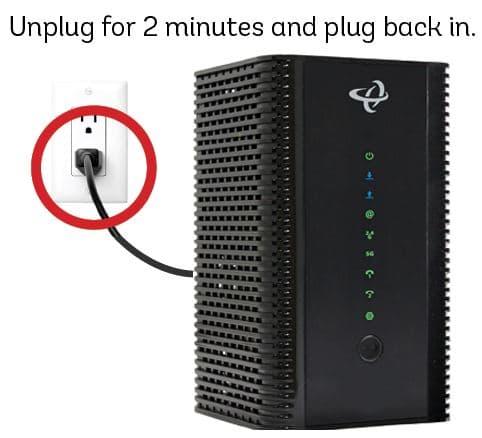
- If your TV doesn’t appear in the list of available displays, try restarting both devices.
- Some laptops have a dedicated Wireless Display option in the Display Settings.
Method 3: Wireless Connection with Chromecast or AirPlay
If you have a Chromecast device or an AirPlay-compatible TV (for Apple users), you can easily stream your laptop display wirelessly.
What You’ll Need
- A laptop with Chrome browser (for Chromecast) or an Apple laptop (for AirPlay)
- A Chromecast device connected to your TV, or an AirPlay-compatible smart TV
Step-by-Step Instructions (Chromecast)
- Make sure your laptop and Chromecast are connected to the same Wi-Fi network.
- Open the Chrome browser and click the More icon (three dots) in the top-right corner.
- Click Cast and select your Chromecast device from the list.
- Choose whether to cast a specific tab or your entire desktop.
Step-by-Step Instructions (AirPlay)
- Ensure your Apple laptop and AirPlay-compatible TV are on the same Wi-Fi network.
- On your laptop, click the AirPlay icon in the menu bar.
- Select your TV from the list of available devices.
- If prompted, enter the AirPlay passcode shown on your TV.
Expert Tips
- For the best streaming quality, minimize the number of devices using your Wi-Fi network.
- If you encounter latency or buffering, try moving your laptop closer to your Wi-Fi router.
- AirPlay and Chromecast support both screen mirroring and media streaming from compatible apps.
Troubleshooting Common Issues
Despite the simplicity of connecting your laptop to your TV, you may occasionally run into problems. Here are some common issues and how to resolve them:
No Picture on TV Screen
- Double-check that your TV is set to the correct HDMI input.
- Ensure your HDMI cable is securely connected to both your laptop and TV.
- Try a different HDMI cable or port on your TV.
- Restart both your laptop and TV.
Laptop Screen Appears Cut Off on TV
- Adjust your TV’s aspect ratio or zoom settings using your TV remote.
- Change your laptop’s display settings to match your TV’s resolution.
Audio Issues
- Check that your TV’s volume is turned up and not muted.
- Ensure your laptop’s audio output is set to HDMI.
- If using a separate audio cable, verify it’s properly connected.
Lag or Stuttering During Wireless Streaming
- Reduce the number of devices using your Wi-Fi network.
- Move your laptop closer to your Wi-Fi router.
- Connect your laptop to your TV using an HDMI cable for a more stable connection.
Choosing the Right HDMI Cable
When connecting your laptop to your TV via HDMI, it’s essential to use a high-quality cable to ensure the best video and audio experience. Here are some factors to consider:
- HDMI version: For 4K content, use an HDMI 2.0 or later cable. For 1080p, an HDMI 1.4 cable will suffice.
- Length: Measure the distance between your laptop and TV to determine the appropriate cable length. Longer cables may require a signal booster.
- Durability: Look for cables with reinforced connectors and braided nylon jackets for added durability.
- Brand reputation: Stick with reputable brands known for producing high-quality HDMI cables, such as Belkin, AmazonBasics, or Monoprice.
Conclusion
Connecting your laptop to your TV is a simple way to enhance your viewing experience and boost your productivity. Whether you opt for a wired HDMI connection or a wireless solution like Miracast, Chromecast, or AirPlay, you can start streaming your laptop display to the big screen in just a few easy steps.
By following the instructions and tips outlined in this guide, you’ll be able to choose the best method for your setup and troubleshoot any issues that may arise. So grab your laptop, pick a connection method, and start enjoying your favorite content on your TV today!