
Want to enjoy DISH satellite TV in multiple rooms without paying for additional receivers? Splitting your DISH Network satellite signal is a cost-effective DIY solution. In this guide, we’ll walk you through the process step-by-step, covering everything you need to know to get your home satellite system set up like a pro.
Benefits of Splitting Your DISH Signal
By installing a satellite splitter, you can:
- Watch DISH programming on multiple TVs without extra receiver fees
- Enjoy the flexibility of placing TVs anywhere with a coax cable connection
- Customize your home entertainment setup to fit your family’s needs
What You’ll Need
Before getting started, gather the following tools and components:
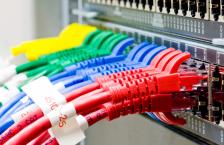
- Satellite splitter (2, 3, or 4-way, depending on number of TVs)
- Coax cables (RG6)
- Coax cable stripper
- Compression tool
- F-connectors
- Grounding block and wire
- Rubber weather boots
You can find satellite splitters and related accessories at most home improvement stores or online retailers like Amazon. Be sure to choose a splitter designed for the frequencies used by DISH.
Step 1: Prepare the Coax Cables

Start by stripping the protective outer layer off each end of the coax cables using the cable stripper. Leave about 1/2 inch of the inner wire exposed. Screw the F-connectors onto each prepared end and use the compression tool to secure them tightly.
Step 2: Install the Grounding Block

Mount the grounding block near your satellite dish following NEC code. Run a ground wire (#10 copper) from the block to an earth ground. This protects your equipment from electrical surges.
Step 3: Connect the Satellite Splitter

- Unscrew the coax cable from your DISH receiver and connect it to the “IN” port on the splitter.
- Connect new coax cables to each “OUT” port, then run them to your desired TV locations.
- Seal all outdoor connections with rubber weather boots.
Step 4: Activate Additional TVs
Power on the TVs connected to your newly split signals. You should now see the DISH programming on each one. If any TVs are not receiving a signal, check that all connections are tight and cables are undamaged.
Pro Tip: If you have a Hopper or Joey setup, you’ll need to run a separate coax from the splitter directly to each unit. Refer to your receiver manual for details.
Troubleshooting Tips
- No Signal: Verify all coax connections are secure. Check for cable damage and replace if needed.
- Intermittent Signal: Ensure the splitter is rated for the correct frequency range (950-2150 MHz for DISH). Inspect for loose connectors.
- Weak Signal: Splitting the signal does result in some loss of signal strength. If the image frequently pixelates, consider a powered amplifier to boost the signal.
By following these steps, you can successfully split your DISH satellite signal to enjoy TV in every room. With a little know-how and the right components, it’s a straightforward process that can save you money every month.
Have you tried splitting your satellite signal? Share your experience or questions in the comments below!


0