
In the ever-evolving world of wireless connectivity, users often find themselves navigating a maze of options. One of the most perplexing issues is the dual-band conundrum, specifically concerning wireless networks that operate at 2.4GHz and 5GHz frequencies. This guide aims to demystify these complexities and provide a step-by-step process to connect to a 5GHz WiFi network on Windows 7, 8, and 10.
Understanding the Dual-Band Issue
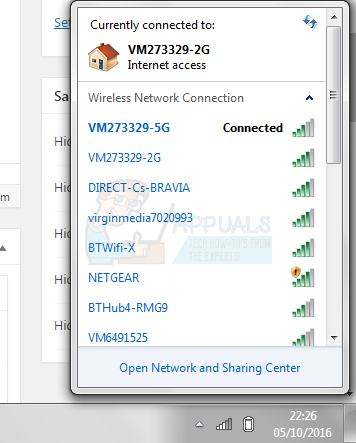
Your router may be capable of emitting both 2.4GHz and 5GHz frequencies. However, you might find that your computer cannot detect the network, especially the faster 5GHz one. The letters following the 802.11 standard in your router and wireless adapter’s name play a crucial role here. Some routers and adapters can only operate on 2.4GHz, while others can work with both.
How to Connect to 5GHz WiFi
Step 1: Check if Your Router and Wireless Adapter Support 5GHz
To determine if your devices support 5GHz, you’ll need to do some online research for your specific models. Look for either supported frequencies or supported radio bands in the specifications. If your router supports a 5GHz wireless network, it will be stated. If you can’t find such information, look for the letters after 802.11, and use the following guide:
- The adapter supports 802.11a: 5GHz
- The adapter supports 802.11b: 2.4GHz
- The adapter supports 802.11g: 2.4GHz
- The adapter may support both 802.11n: 2.4GHz and 5GHz, but not necessarily
- The adapter supports 802.11c: 5GHz
Generally, a router that states it’s 802.11a/g/n, or 802.11ac will work at 5GHz. However, a router that is 802.11b/g/n has a slim chance of supporting that frequency, and you may need to upgrade.
Step 2: Check Your Adapter
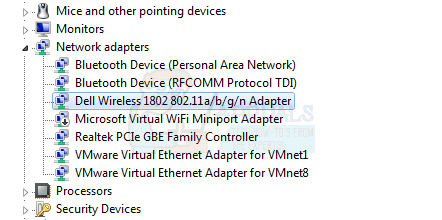
Open Device Manager by pressing the Windows key on your keyboard, typing Device Manager, and opening the result. Expand Network Adapters and locate your wireless adapter. See its name, and see whether it says anything about the radio bands it supports. If it doesn’t say anything, use your favorite search engine to get to the manufacturer’s website, from where you can see whether it supports 5GHz.
Step 3: Use Command Prompt
Another way to check if your adapter has 5GHz capability is through the command prompt. Press Windows + R and type “cmd”. Once the command prompt comes forth, type “netsh wlan show drivers”.
Step 4: Enable 802.11n Mode on Your Adapter

If your hardware is compatible with 5GHz bandwidth, but you still can’t use it, it might be simply disabled. In this case, you will need to manually enable it. Using the Device Manager, locate your wireless adapter. Right-click it, and select Properties from the dropdown menu. Within the Advanced tab, click 802.11n mode. To the right, set the value to Enable. When you’ve done this, click OK and restart your computer. You should now be able to see your 5GHz network.
Conclusion
Navigating the sea of wireless standards can be challenging. However, following the steps outlined above will help you establish a fully functional 5GHz network, provided you have compatible hardware. Remember, it’s possible that you may need to purchase new hardware if you’re committed to using 5GHz.


0