Is your Windows 7 computer suddenly unable to connect to the internet through an ethernet cable? Don’t panic – you’re not alone. Many Windows 7 users have encountered this frustrating issue where their wired network connection stops working out of the blue.
The culprit could be anything from a damaged cable to outdated network drivers to incorrect settings. But with some patient troubleshooting, you should be able to identify and resolve the problem to get back online.
In this comprehensive guide, we’ll walk through the most effective tips and fixes for troubleshooting ethernet cable issues on Windows 7 in 2024. Whether you’re an average user or an IT pro, these step-by-step solutions will help you methodically diagnose and repair your faulty wired connection. Let’s dive in!
Check the Basics First
Before attempting any advanced fixes, it’s always wise to start with the fundamentals:
Inspect the Ethernet Cable
Your first step should be to carefully examine the ethernet cable for any visible damage or fraying. If you spot any issues, try using a different known-good cable to test if that resolves the connectivity problem.
Also ensure that the cable is firmly plugged into your computer’s ethernet port and your router or modem. An accidentally loose connection is an easy issue to overlook.
Reboot Your Devices
If the cable looks okay, try rebooting your Windows 7 PC as well as your modem and router. This can often clear up temporary glitches that may be preventing your computer from recognizing the ethernet connection.
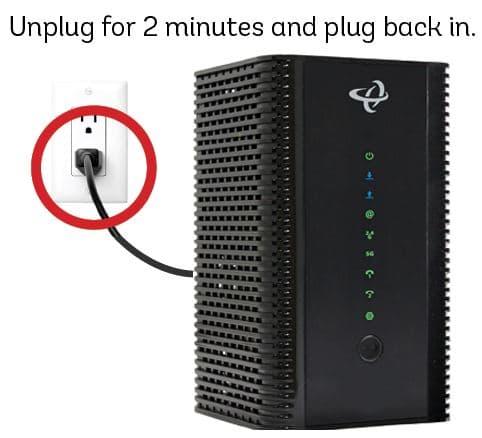
- Shut down your computer completely and unplug your modem and router
- Wait at least 30 seconds, then plug the modem and router back in
- Allow them to fully reboot, then start your PC back up
- Check if your ethernet connection is restored
Test Alternate Ports
Another basic troubleshooting step is to try plugging your ethernet cable into a different port on your router or switch, if available. It’s possible the original port has gone bad, so testing with another one can help isolate the issue.
Diagnose with Windows’ Built-in Tools
Windows 7 includes some handy utilities that can help identify and resolve network adapter issues. Here’s how to access them:
Run the Network Adapter Troubleshooter
- Open the Start menu and type “troubleshoot” in the search box
- Click “Troubleshooting” under the Control Panel section
- Under Network and Internet, click “Connect to the Internet”
- In the new window, click “Advanced” and ensure “Apply repairs automatically” is checked
- Click Next to run the automated troubleshooter
The troubleshooter will scan for common ethernet issues and attempt to apply a fix. However, if that doesn’t do the trick, you can continue with manually diagnosing the adapter.
Check the Adapter Status
- Right-click the Start button and select “Device Manager”
- Expand the Network Adapters section
- Find your ethernet adapter in the list and double-click it
- Check the Device status here – it should say “This device is working properly”
- If you see a code 10 error or other issues, try the additional steps below
Update or Reinstall the Network Driver
Faulty or outdated network drivers can often cause Windows 7 ethernet issues. To rule that out:
- In Device Manager, right-click your ethernet adapter and select “Update Driver Software”
- Click “Search automatically for updated driver software”
- If Windows finds a newer driver, follow the prompts to install it
- Restart your PC and test the ethernet connection again
If updating doesn’t help, you can also try fully uninstalling and reinstalling the driver:
- In Device Manager, right-click the ethernet adapter and choose “Uninstall”
- Check the box for “Delete the driver software for this device” if available
- Click OK, then restart your computer
- Windows should automatically attempt to reinstall the network driver
- If that doesn’t happen, visit your PC or motherboard manufacturer’s website to download the latest driver
Reset Your Network Configuration
If the ethernet adapter seems to be working but you still can’t get online, some network configuration settings may be causing a conflict. To reset them to defaults:
- Right-click the Start button and choose “Command Prompt (Admin)”
- In the command prompt, type the following commands, pressing Enter after each one:
netsh winsock resetnetsh int ip resetipconfig /releaseipconfig /renewipconfig /flushdns - Reboot your computer and check if your ethernet connection works
These commands will reset your network adapter’s configurations to defaults and refresh your IP address and DNS settings, which can often clear up lingering connectivity bugs.
Disable Any Third-Party Firewall or Antivirus
In some cases, an overprotective third-party firewall or antivirus program may be blocking your ethernet connection. To see if that’s the issue:
- Temporarily disable any non-Microsoft firewall, antivirus, or VPN software
- Check if your ethernet starts working with these disabled
- If so, you may need to adjust the settings or exceptions in that particular program to allow your ethernet connection
- As a last resort, consider uninstalling the problematic program and switching to an alternative
Perform a System Restore
If your ethernet connection was working previously but suddenly stopped, a System Restore may be able to revert your computer to a point when it was functioning. Keep in mind this will remove any programs or updates installed after that restore point.
- Open the Start menu and type “system restore”
- Click “System Restore” under the Programs section
- Choose “Recommended restore” or pick a restore point from before your ethernet issues began
- Follow the prompts to confirm and perform the system restore
- After the process completes, restart and test your ethernet connection
When All Else Fails
If you’ve exhausted all these troubleshooting steps and your Windows 7 computer still won’t recognize your ethernet cable, there may be a hardware issue with your network adapter or motherboard. At this point, it’s best to contact your computer manufacturer’s technical support or take your PC to a professional repair service for further diagnosis.
Wrapping Up
Losing your ethernet connection can quickly grind your work or studies to a halt. But by methodically working through these troubleshooting tips, you should be able to resolve most common Windows 7 network cable issues on your own.
The key is to start with the basics like checking the physical cable and rebooting your equipment, then progress to more advanced steps like updating drivers, resetting network configurations, and performing a system restore.
If all else fails, don’t hesitate to reach out to your PC manufacturer or a local computer repair shop for hands-on assistance. With a little persistence and perhaps some expert help, you’ll be back to reliable wired internet access in no time.

![[Windows 8] How to share Internet connection with your phone, tablet, other computers, and other dev](https://www.800908.com/wp-content/uploads/2021/10/1224-6.png)