In today’s hyperconnected world, a reliable home network is no longer a luxury—it’s a necessity. Whether you’re working remotely, streaming 4K content, or managing a smart home ecosystem, the foundation of your digital life begins with properly setting up your wireless router. This guide will walk you through the process, ensuring you create a secure, efficient, and future-proof network.
Understanding the Importance of Router Setup
Before diving into the technical steps, it’s crucial to understand why proper router setup matters. A well-configured router not only provides faster and more reliable internet access but also forms the first line of defense against cyber threats. Moreover, as the number of connected devices in homes continues to grow—with the average household now managing over 20 devices—optimizing your network has become more critical than ever.
Choosing the Right Router
The first step in creating an optimal home network is selecting the right router. In 2024, consider these factors:
- Wi-Fi Standards: Look for routers supporting Wi-Fi 6 (802.11ax) or the newer Wi-Fi 6E, which offer significant improvements in speed, capacity, and performance over older standards.
- Mesh Capability: For larger homes or those with complex layouts, a mesh system like the TP-Link Deco M5 can provide seamless coverage throughout your space.
- Security Features: Prioritize routers with built-in security features such as WPA3 encryption and automatic firmware updates.
- Smart Home Compatibility: Ensure your router can handle the increasing demands of smart home devices, including support for IoT protocols like Thread or Zigbee.
Step-by-Step Setup Process
1. Optimal Router Placement
The physical location of your router plays a crucial role in network performance. Here’s why:
- Central Location: Placing your router in a central, elevated position allows for more even signal distribution throughout your home.
- Avoid Interference: Keep the router away from metal objects, thick walls, and other electronic devices that can interfere with the Wi-Fi signal.
Pro Tip: If your ISP’s modem is in a non-ideal location, use a longer Ethernet cable to position your router more centrally.
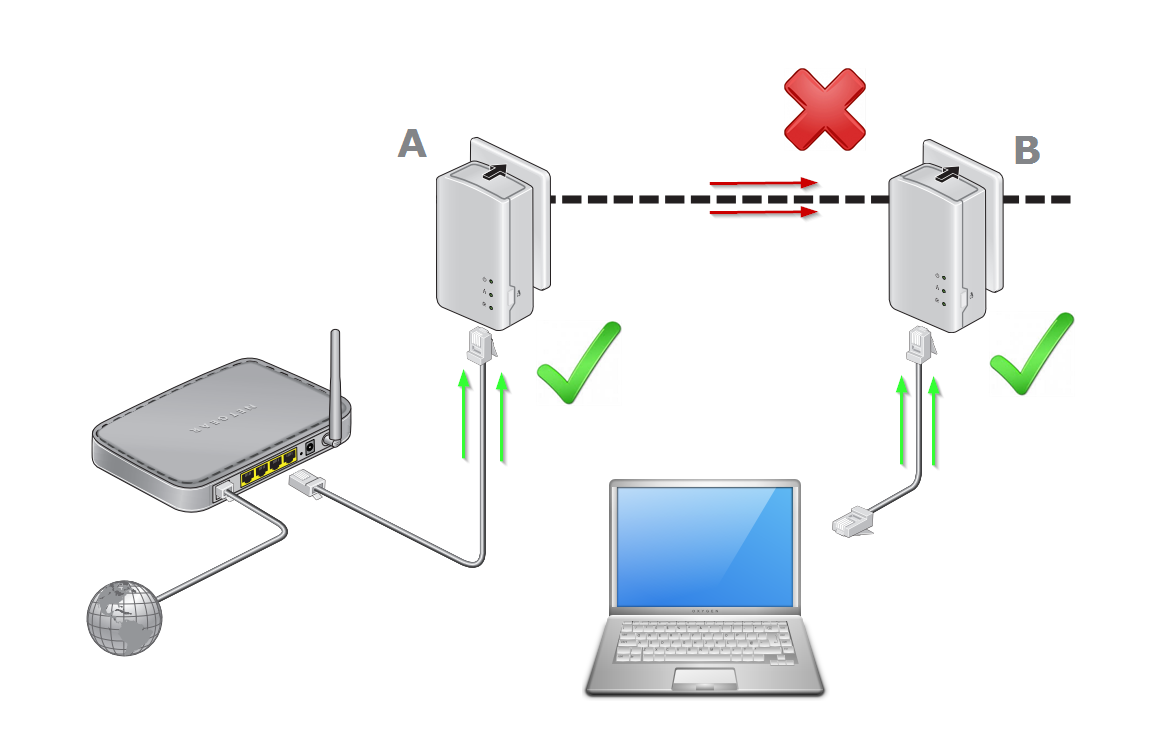
2. Connecting the Hardware
- Power down your modem.
- Connect the router’s WAN port to the modem using an Ethernet cable.
- Power on the modem and wait for it to fully boot.
- Power on the router.
This sequence ensures proper IP assignment and prevents connectivity issues.
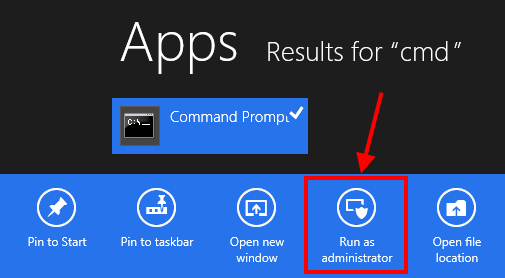
3. Accessing the Router’s Configuration Page
Most modern routers offer two configuration methods:
- Smartphone App: Many manufacturers now provide dedicated apps for easy setup.
- Web Interface: Access via a browser by entering the router’s IP address (commonly 192.168.0.1 or 192.168.1.1).
For first-time setup, the app method is often more user-friendly and guides you through essential security settings.
4. Essential Configuration Steps
- Change Default Credentials: Immediately change the router’s admin password to prevent unauthorized access.
- Set Up Wi-Fi Network:
- Choose a unique SSID (network name).
- Set a strong password using WPA3 encryption if available.
- Consider setting up separate 2.4GHz and 5GHz networks for optimal device compatibility and performance.
- Enable Security Features:
- Activate the built-in firewall.
- Enable automatic firmware updates to ensure your router stays protected against the latest threats.
- Configure Advanced Settings:
- Set up a guest network to keep your main network secure.
- Implement Quality of Service (QoS) settings to prioritize bandwidth for critical applications or devices.
Optimizing Your Network
After the basic setup, consider these optimization steps:
- Channel Selection: Use tools like Wi-Fi Analyzer to identify the least congested Wi-Fi channels in your area.
- Enable MU-MIMO: If your router supports it, Multi-User Multiple-Input Multiple-Output technology can significantly improve performance when multiple devices are connected simultaneously.
- Regular Updates: Schedule monthly checks for firmware updates to ensure your router has the latest features and security patches.
- Network Monitoring: Use your router’s built-in tools or third-party apps to monitor network usage and identify potential issues proactively.
Troubleshooting Common Issues
Even with careful setup, you may encounter issues. Here are some common problems and their solutions:
- Slow Speeds:
- Cause: Interference, outdated firmware, or suboptimal settings.
- Solution: Update firmware, adjust channel settings, or consider a mesh system for better coverage.
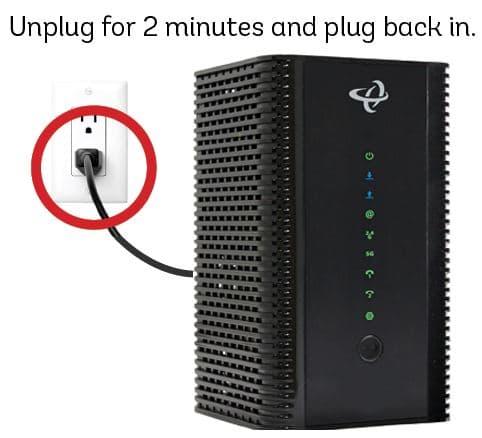
- Frequent Disconnections:
- Cause: Signal interference or router overheating.
- Solution: Ensure proper ventilation for your router and minimize nearby electronic interference.
- Limited Range:
- Cause: Physical obstructions or router limitations.
- Solution: Consider adding Wi-Fi extenders or upgrading to a mesh system.
Future-Proofing Your Network
As we look ahead, consider these emerging trends to keep your network ready for future technologies:
- Wi-Fi 6E and Beyond: Stay informed about the latest Wi-Fi standards and upgrade when significant improvements become available.
- IoT Integration: Ensure your network can handle the increasing number of smart devices by implementing proper segmentation and security measures.
- Edge Computing: As more processing moves to the edge, having a robust home network will become even more critical for seamless experiences with AR/VR and other emerging technologies.
By following this comprehensive guide, you’ll not only set up a wireless router that meets your current needs but also create a foundation for a future-proof smart home ecosystem. Remember, a well-configured network is an investment in your digital life, providing security, performance, and peace of mind in our increasingly connected world.