In today’s interconnected world, a reliable wireless network is essential for both home and office environments. Whether you’re streaming your favorite shows, working remotely, or connecting smart home devices, a well-configured Wi-Fi network is the backbone of modern connectivity. This guide will walk you through the process of setting up a wireless network, from choosing the right equipment to optimizing your connection for peak performance.
Understanding Wireless Networks
Before diving into the setup process, it’s crucial to understand the basics of wireless networking. A wireless network allows devices to connect to the internet and communicate with each other without the need for physical cables. This technology has revolutionized how we interact with our digital world, enabling seamless connectivity for smartphones, laptops, smart home devices, and more.
Key Components of a Wireless Network:
- Internet Service Provider (ISP): The company that provides your internet connection
- Modem: Converts the signal from your ISP into a format your devices can use
- Router: Broadcasts the wireless signal and manages network traffic
- Connected Devices: Computers, smartphones, smart home gadgets, etc.
Choosing the Right Equipment
Selecting the appropriate hardware is crucial for a robust and reliable wireless network. Here’s what you need to consider:
Modem Selection:
- Compatibility with your ISP’s service
- Support for your internet plan’s speed
- DOCSIS version (for cable internet)
Router Considerations:
- Wi-Fi standards (802.11ac, Wi-Fi 6, etc.)
- Dual-band or tri-band capabilities
- Coverage area and number of antennas
- Security features (WPA3 support)
Modem-Router Combos:
Some devices combine both modem and router functions into a single unit. While convenient, these may offer less flexibility for future upgrades.
Step-by-Step Setup Guide
Now that you understand the basics and have chosen your equipment, let’s walk through the setup process:
- Gather Your Equipment
- Modem
- Router (if separate from modem)
- Ethernet cables
- Power adapters
- Computer or smartphone for configuration
- Connect the Modem
- Plug the coaxial cable from your ISP into the modem
- Connect the power adapter and turn on the modem
- Wait for the modem to fully boot up (usually indicated by stable lights)
- Connect the Router
- Use an Ethernet cable to connect the modem to the router’s WAN port
- Plug in the router’s power adapter and turn it on
- Allow the router to boot up completely
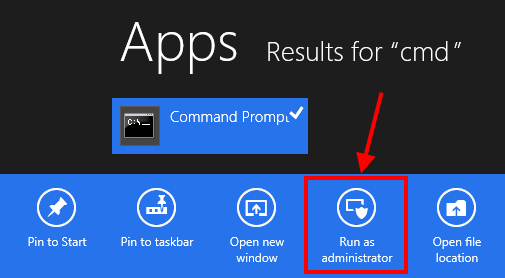
- Access Router Settings
- Connect to the router via Ethernet or default Wi-Fi network
- Open a web browser and enter the router’s IP address (often 192.168.0.1 or 192.168.1.1)
- Log in using the default credentials (usually printed on the router)
- Configure Basic Settings
- Change the default admin password
- Set your desired Wi-Fi network name (SSID)
- Choose a strong Wi-Fi password
- Select WPA3 security if available, or WPA2 at minimum
- Optimize Wi-Fi Settings
- Choose appropriate channels for 2.4GHz and 5GHz bands
- Set channel width (20MHz for 2.4GHz, 80MHz for 5GHz if possible)
- Enable band steering if available
- Update Firmware
- Check for and install any available firmware updates
- This ensures you have the latest features and security patches
- Connect Devices
- Use your new network name and password to connect your devices
- Test the connection on various devices throughout your space
Advanced Configuration Tips
To get the most out of your wireless network, consider these advanced settings:
Quality of Service (QoS):
Prioritize traffic for specific applications or devices to ensure smooth performance for critical tasks like video conferencing or gaming.
Guest Network:
Create a separate network for visitors to maintain security on your main network.
MAC Address Filtering:
Add an extra layer of security by allowing only specific devices to connect.
VPN Setup:
Configure a VPN at the router level for enhanced privacy across all connected devices.
Troubleshooting Common Issues
Even with careful setup, you may encounter some issues. Here are solutions to common problems:
Slow Speeds:
- Check for interference from nearby networks
- Ensure you’re on the least congested channel
- Verify that your internet plan matches your needs
Dead Zones:
- Consider adding a mesh network system or Wi-Fi extenders
- Optimize router placement for better coverage
Frequent Disconnects:
- Update router firmware
- Check for overheating issues
- Ensure power supply is stable
Maintaining Your Wireless Network
Regular maintenance will keep your network running smoothly:
- Update firmware regularly
- Change passwords periodically
- Monitor connected devices for unauthorized access
- Perform speed tests to ensure consistent performance
Future-Proofing Your Network
As technology evolves, so should your network. Keep these future trends in mind:
- Wi-Fi 6E and upcoming Wi-Fi 7 standards
- Increased IoT device adoption
- Higher bandwidth requirements for streaming and AR/VR applications
By following this guide, you’ll be well-equipped to set up and maintain a robust wireless network that meets your connectivity needs now and in the future. Remember, a well-configured network is the foundation for a seamless digital experience in your home or office.